DackieSwap is the premier user-friendly multi-chain DEX.
OKX’s L2 is a ZK-powered Layer 2 network that connects the OKX and Ethereum communities, allowing anyone to participate in a truly global on-chain ecosystem.
TL;DR
-
Pre-condition before go to test
-
How to swap/add/remove liquidity on DackieSwap OKX’s L2 Testnet for newcomers
PRE-CONDITION
1/ User must have faucet OKB before test. You can access to OKB Faucet page via this button.

2/ This experiment guideline is for new commer so there will be some very basic content
3/ We assume that user has knowledge about web 3 wallet before test, for user who has no experient about web3 wallet please visit HERE. In this guide we will use OKX Web3 Wallet.
HOW TO SWAP
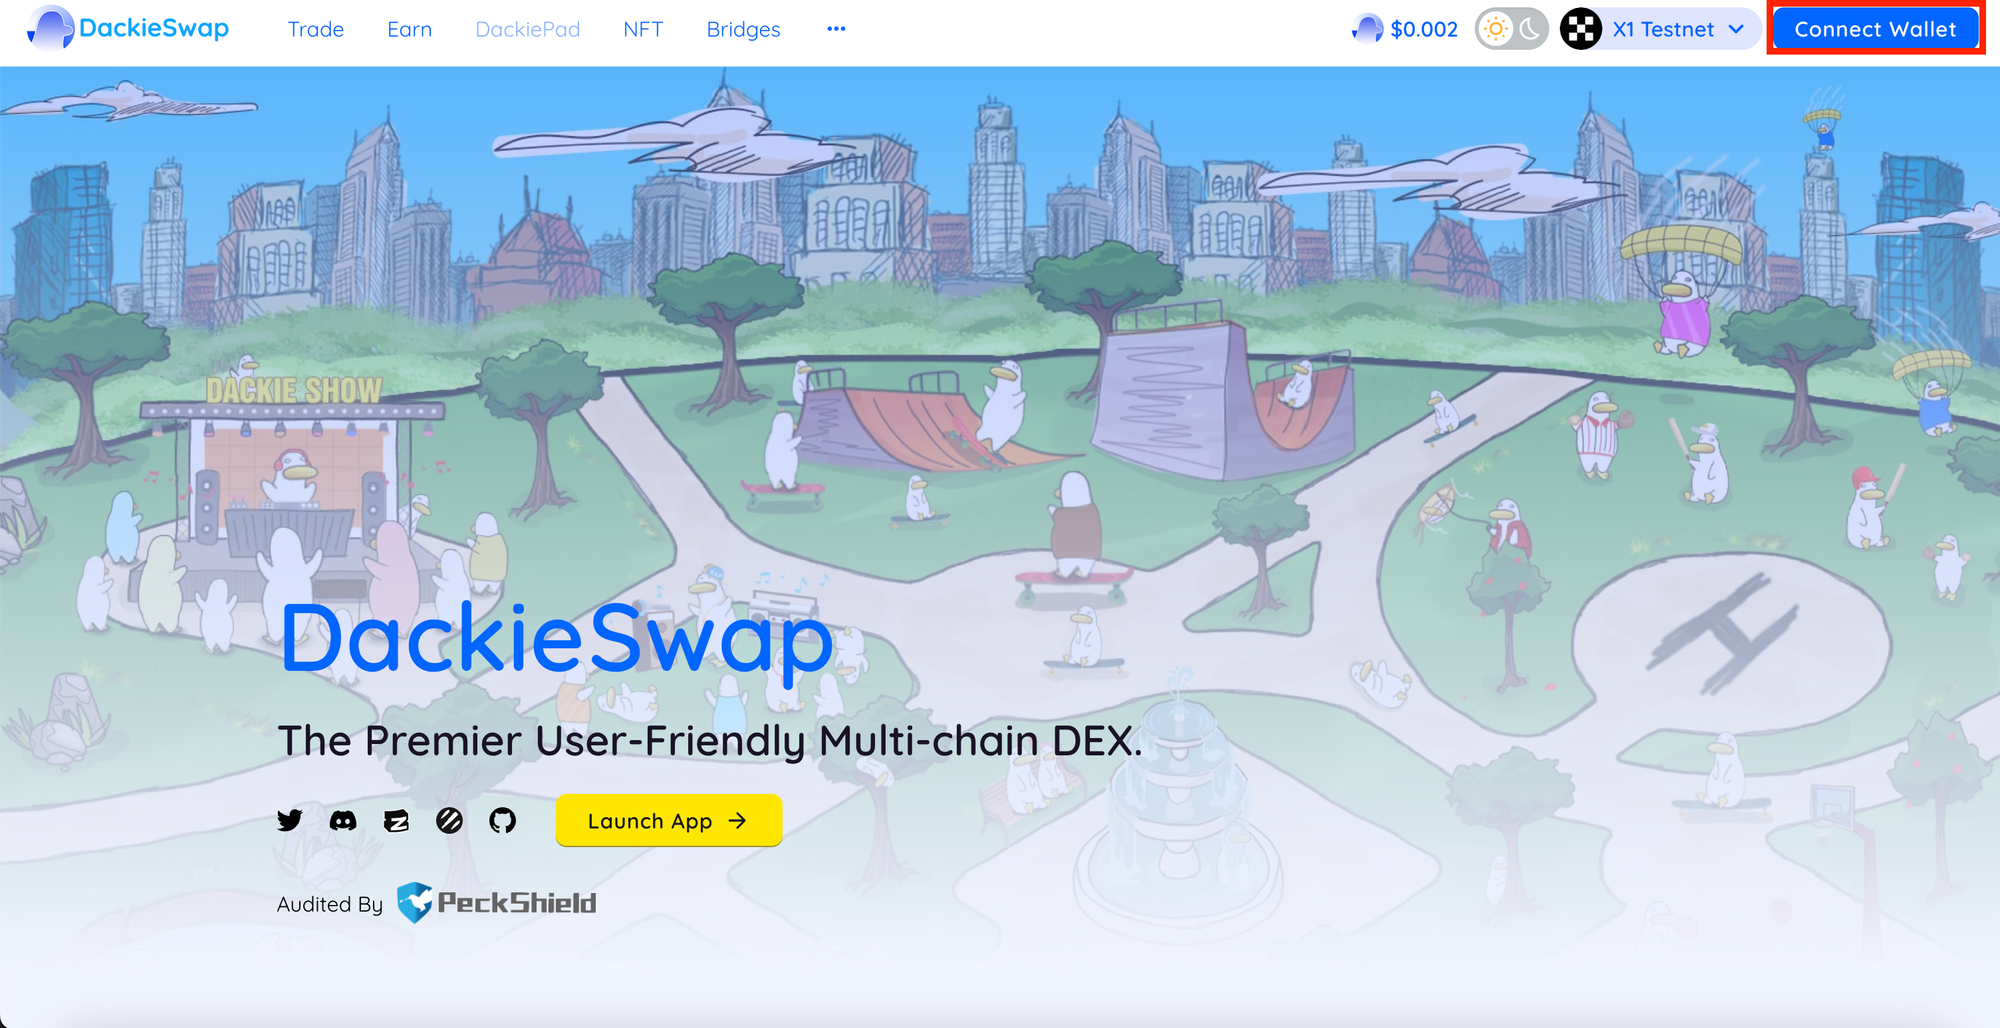
1/ Go to DackieSwap
2/ Click Connect Wallet in the upper right corner
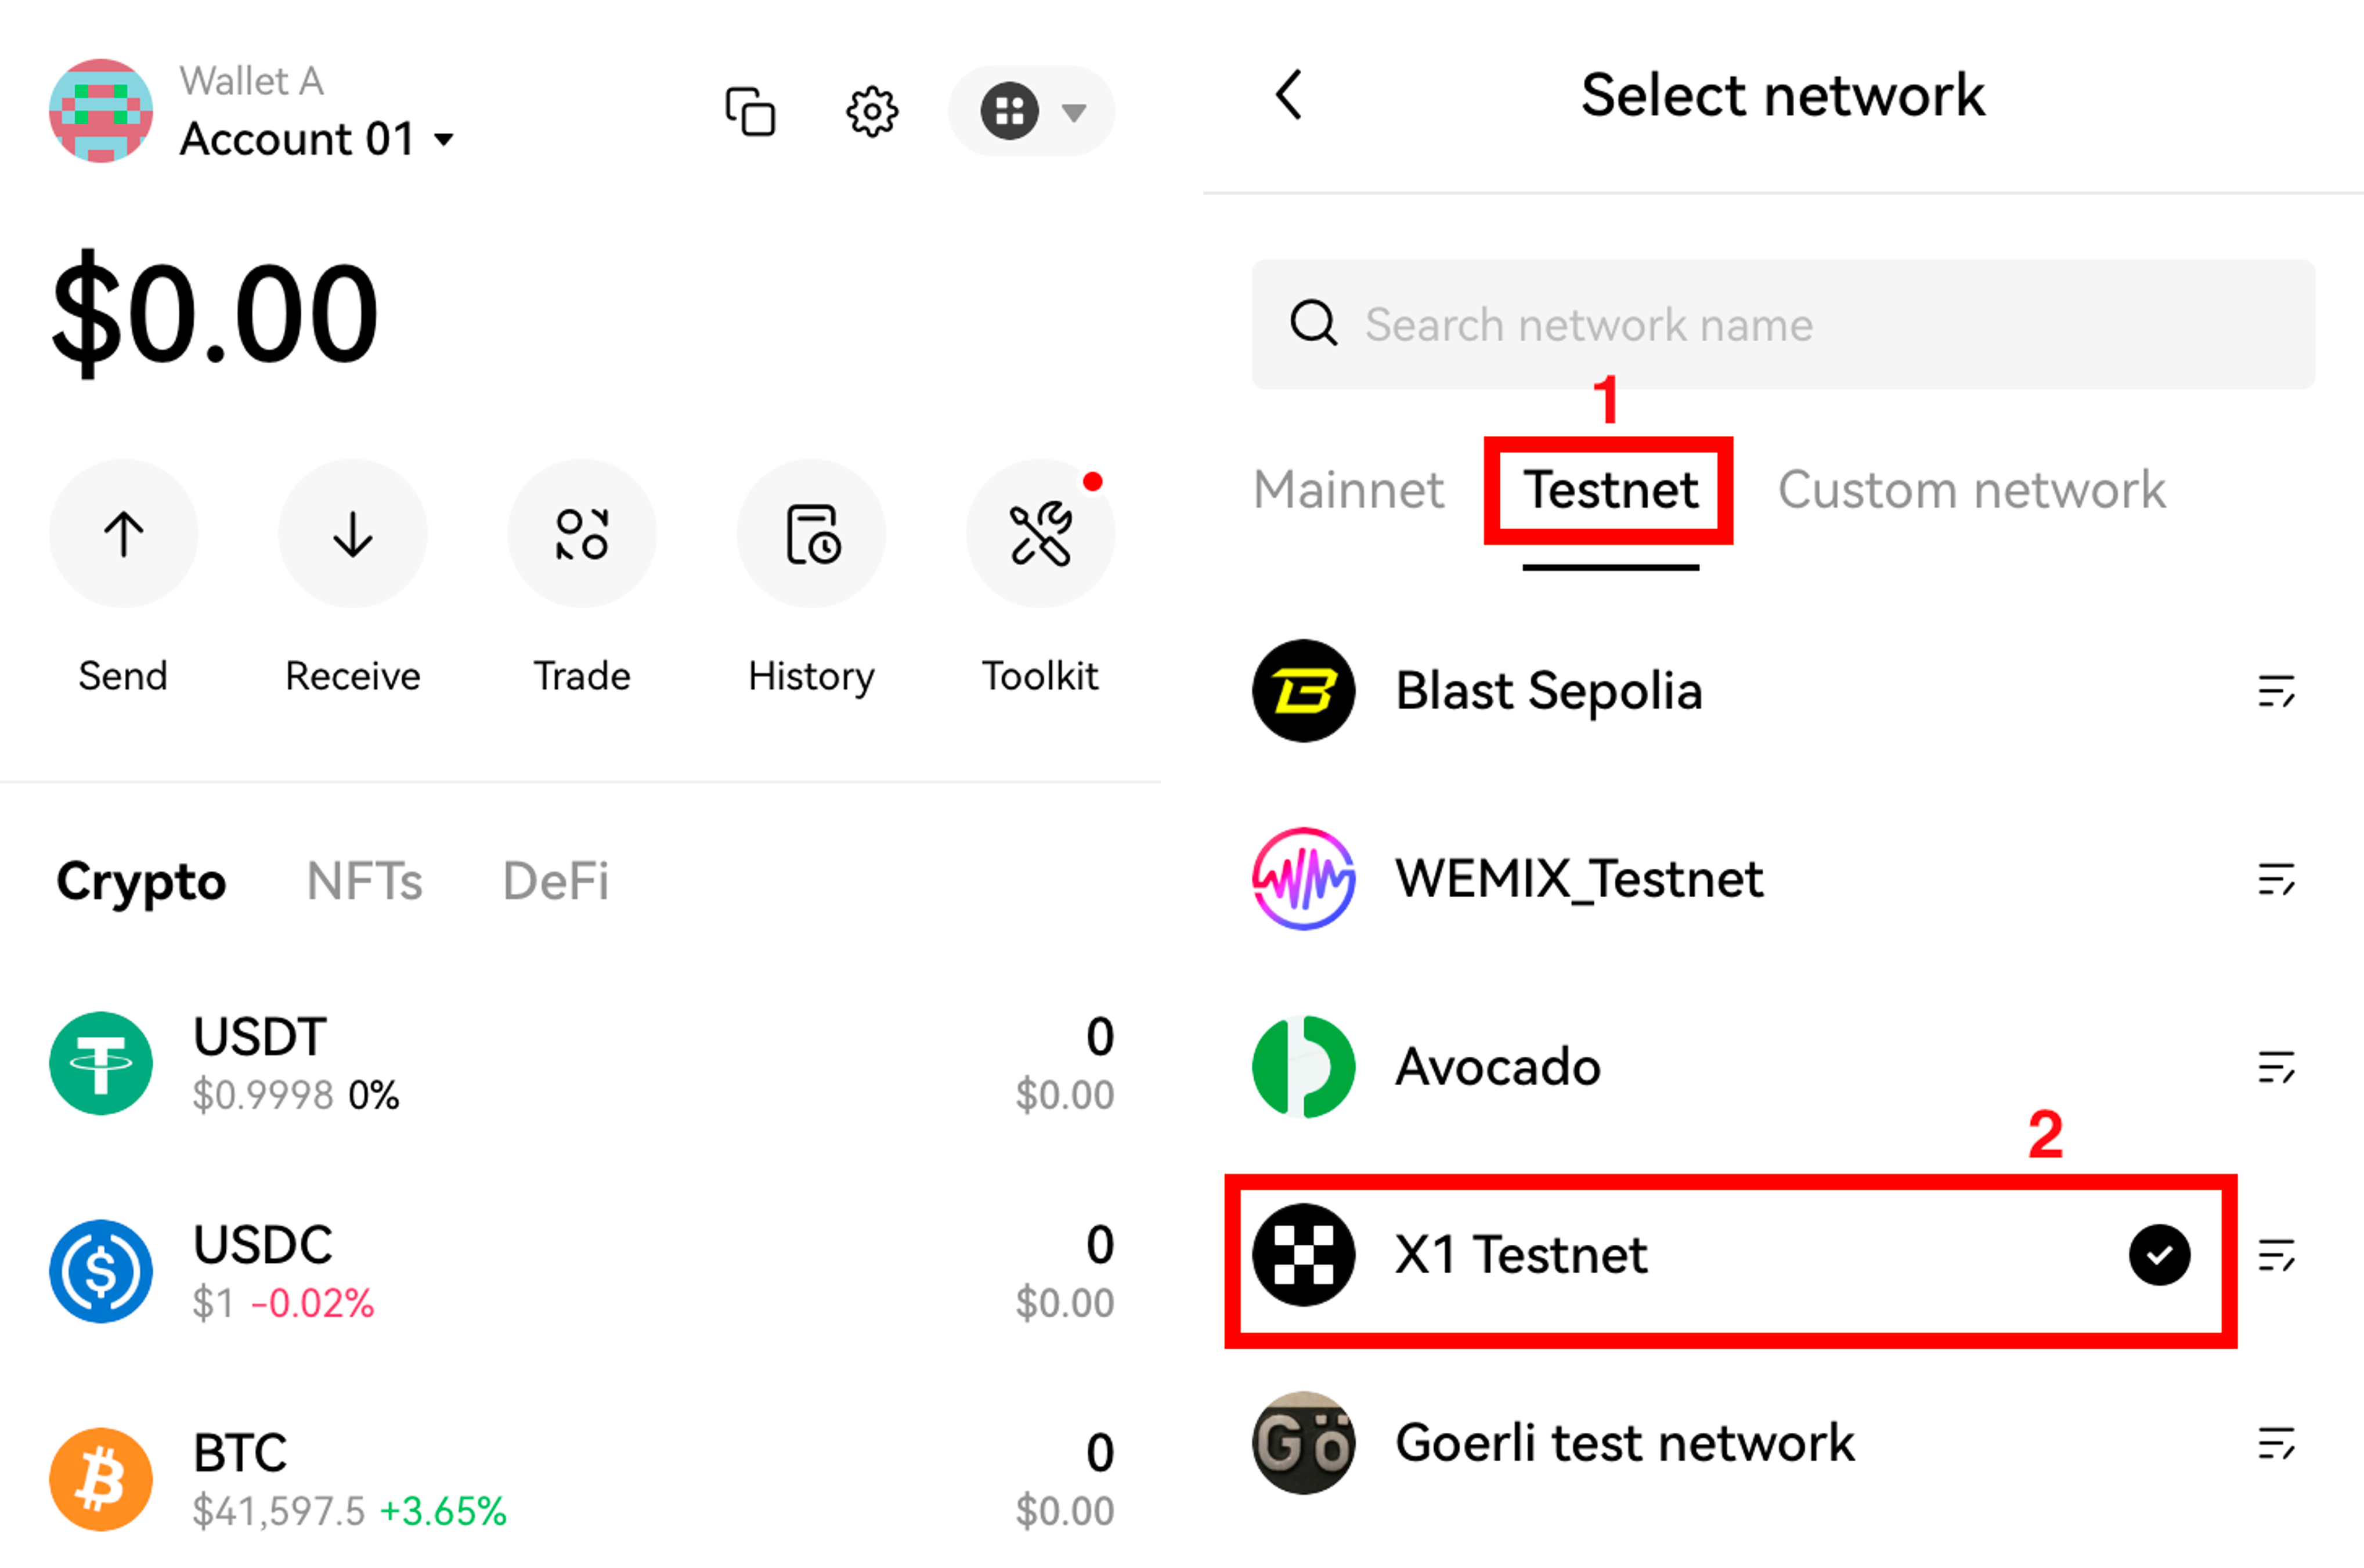
3/ Click OKX Wallet to connect, then you must switch to X1 network in OKX Wallet

4/ Unlock your OKX Wallet and click the network selection icon in the upper right corner.
5/ Click Testnet tab and find the X1 Testnet. Click the bottom to switch to X1 testnet. You are now on the X1 testnet.
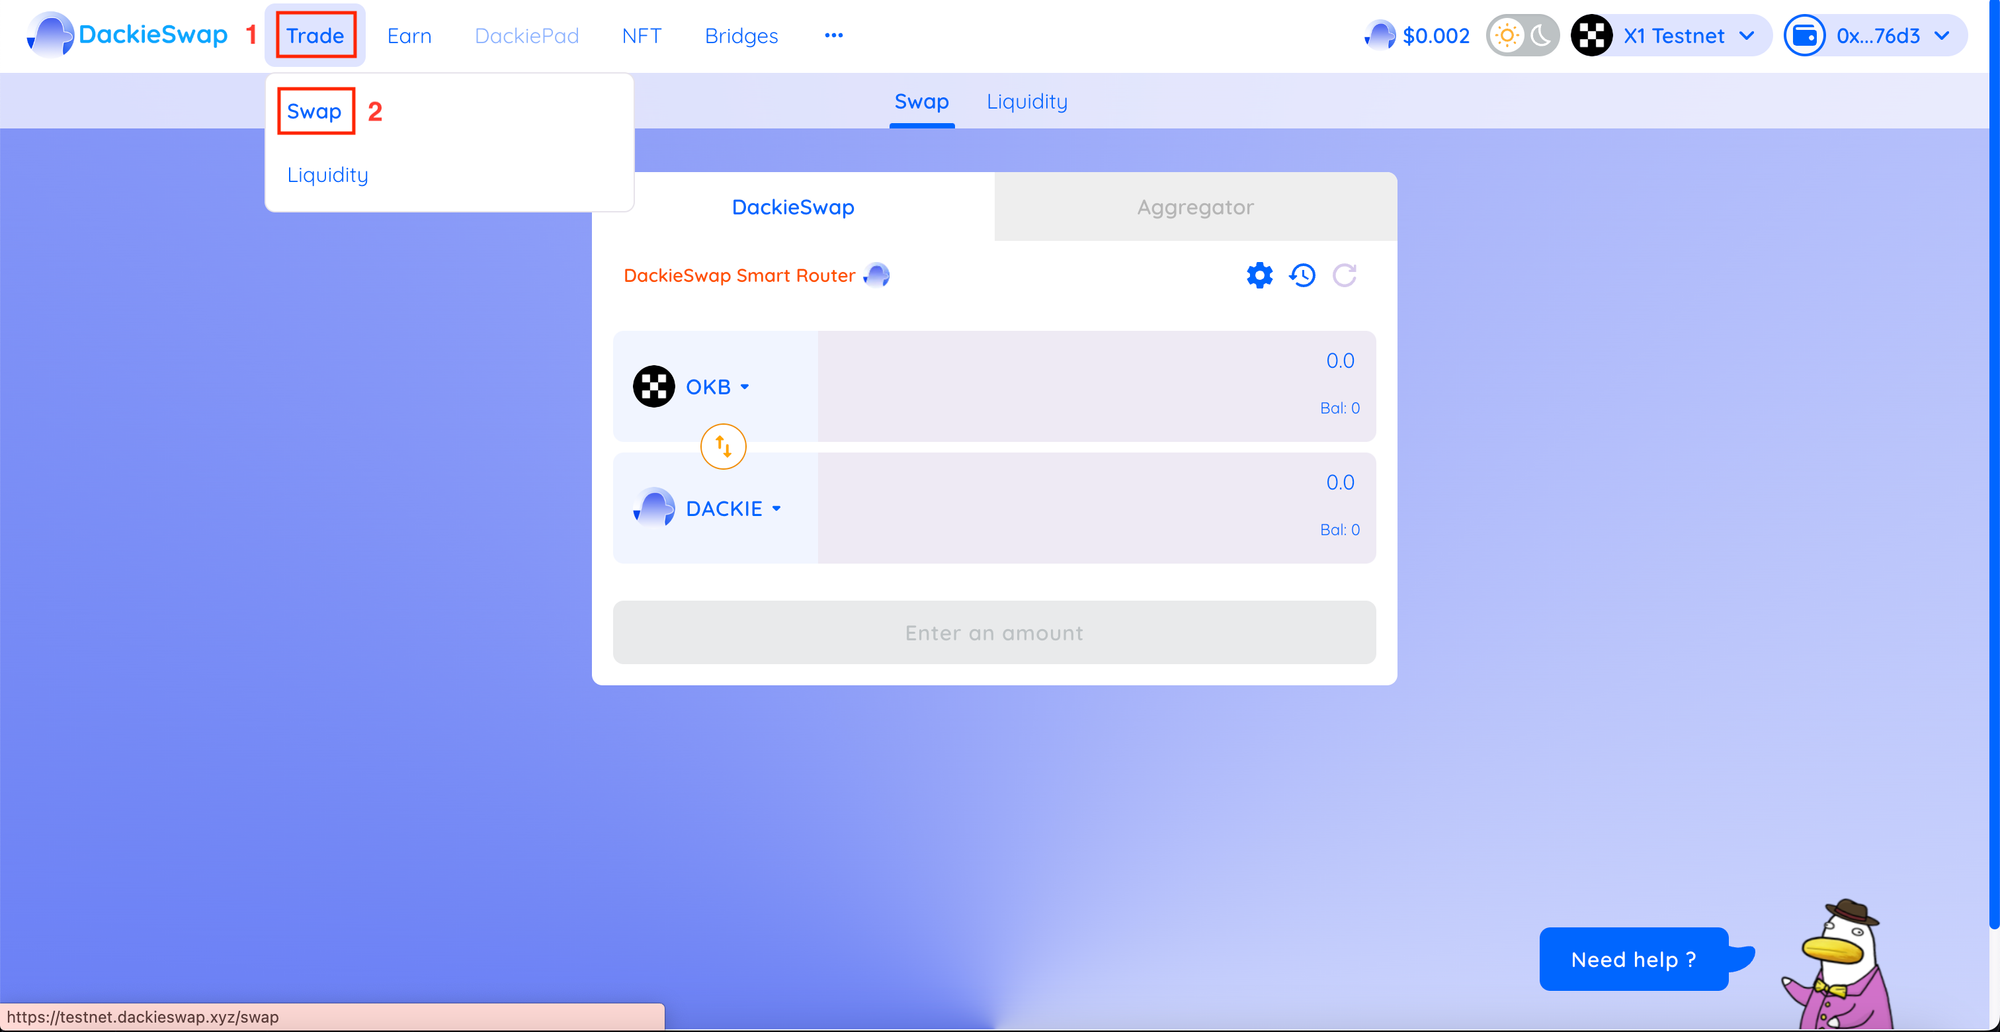
6/ Back to DackieSwap screen, choose Trade, click Swap and you'll be presented with the main Swap screen:
7/ Choose the token you want to trade from the dropdown menu in at the top and choose the token you want to trade to in the second dropdown menu. Your balance is shown in the token dropdown menu.
8/ Next, you can either enter an amount in the upper section to input the number of tokens you want to swap, or enter an amount in the lower section for the number of tokens you wish to receive.
Adjust the amount of the token up or down until you're comfortable with both the spending and receiving amounts.
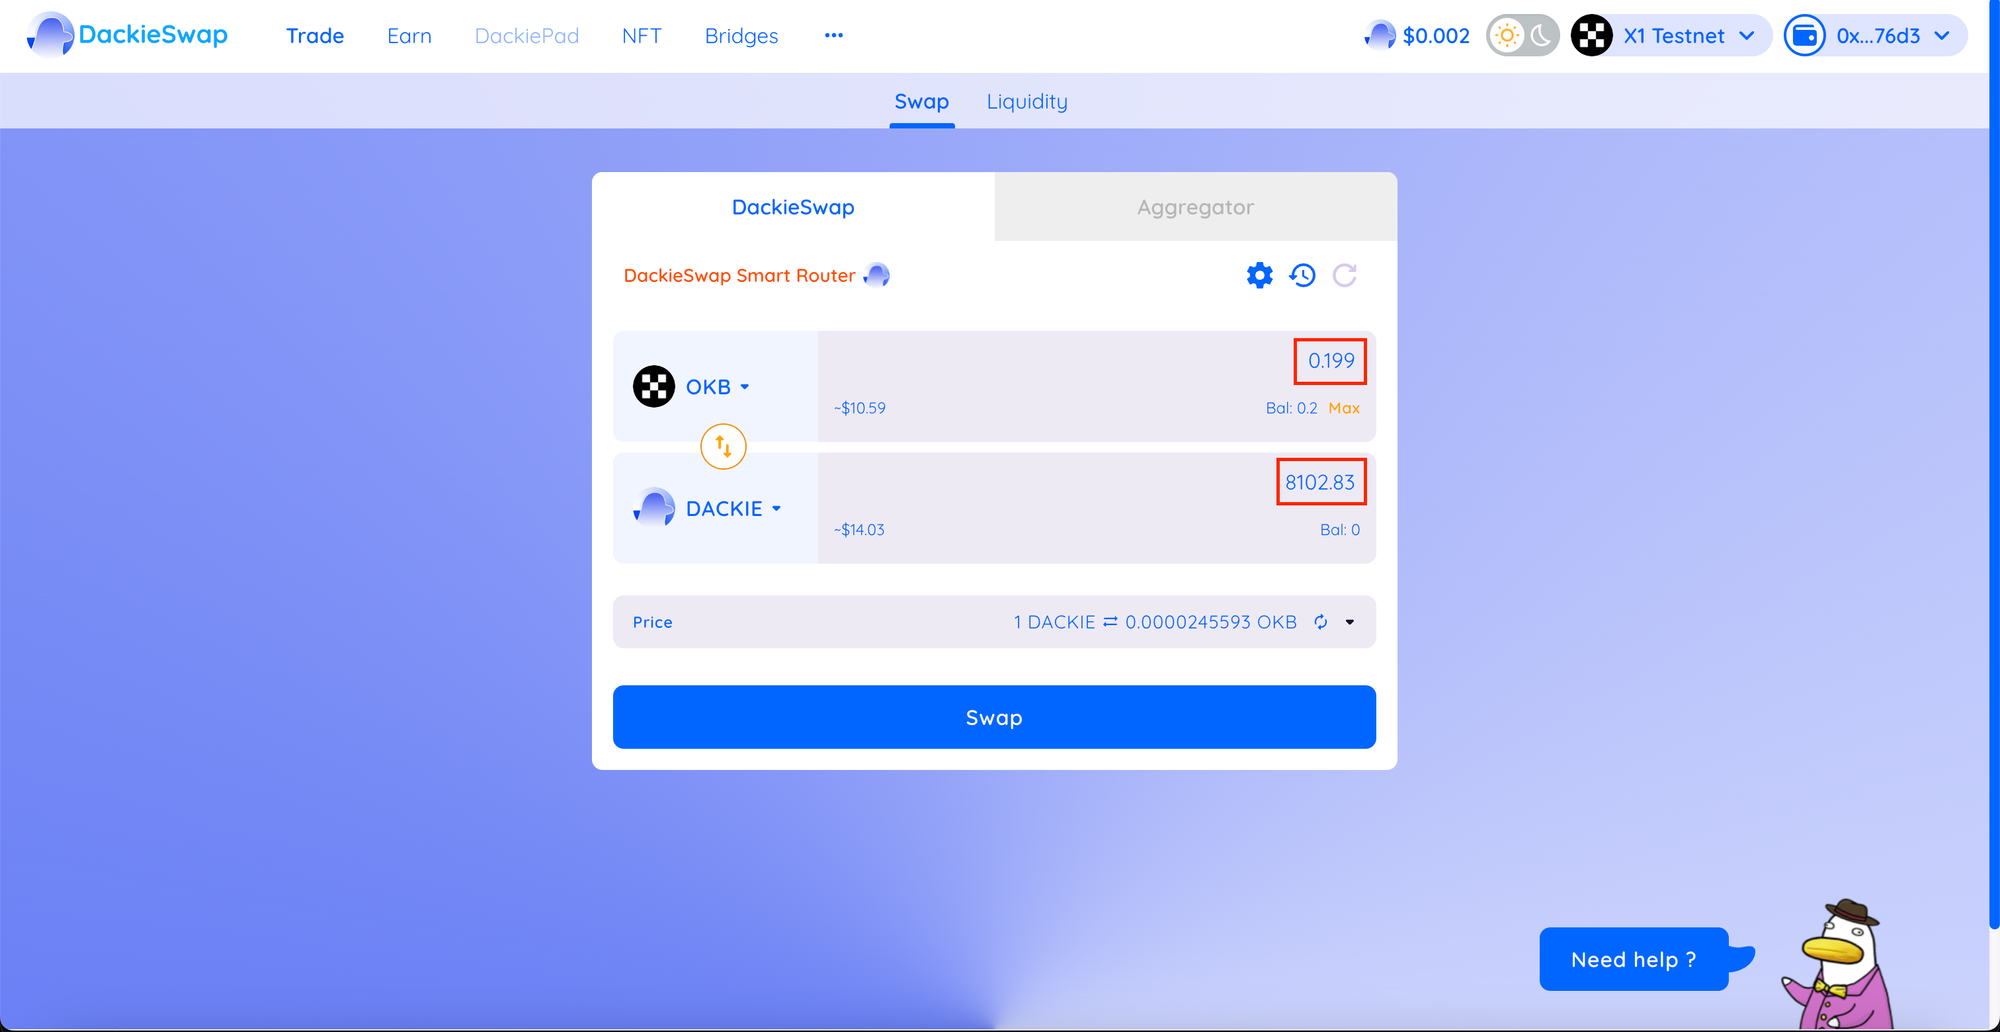
9/ Check all the details to make sure all is correct, click the Swap button.
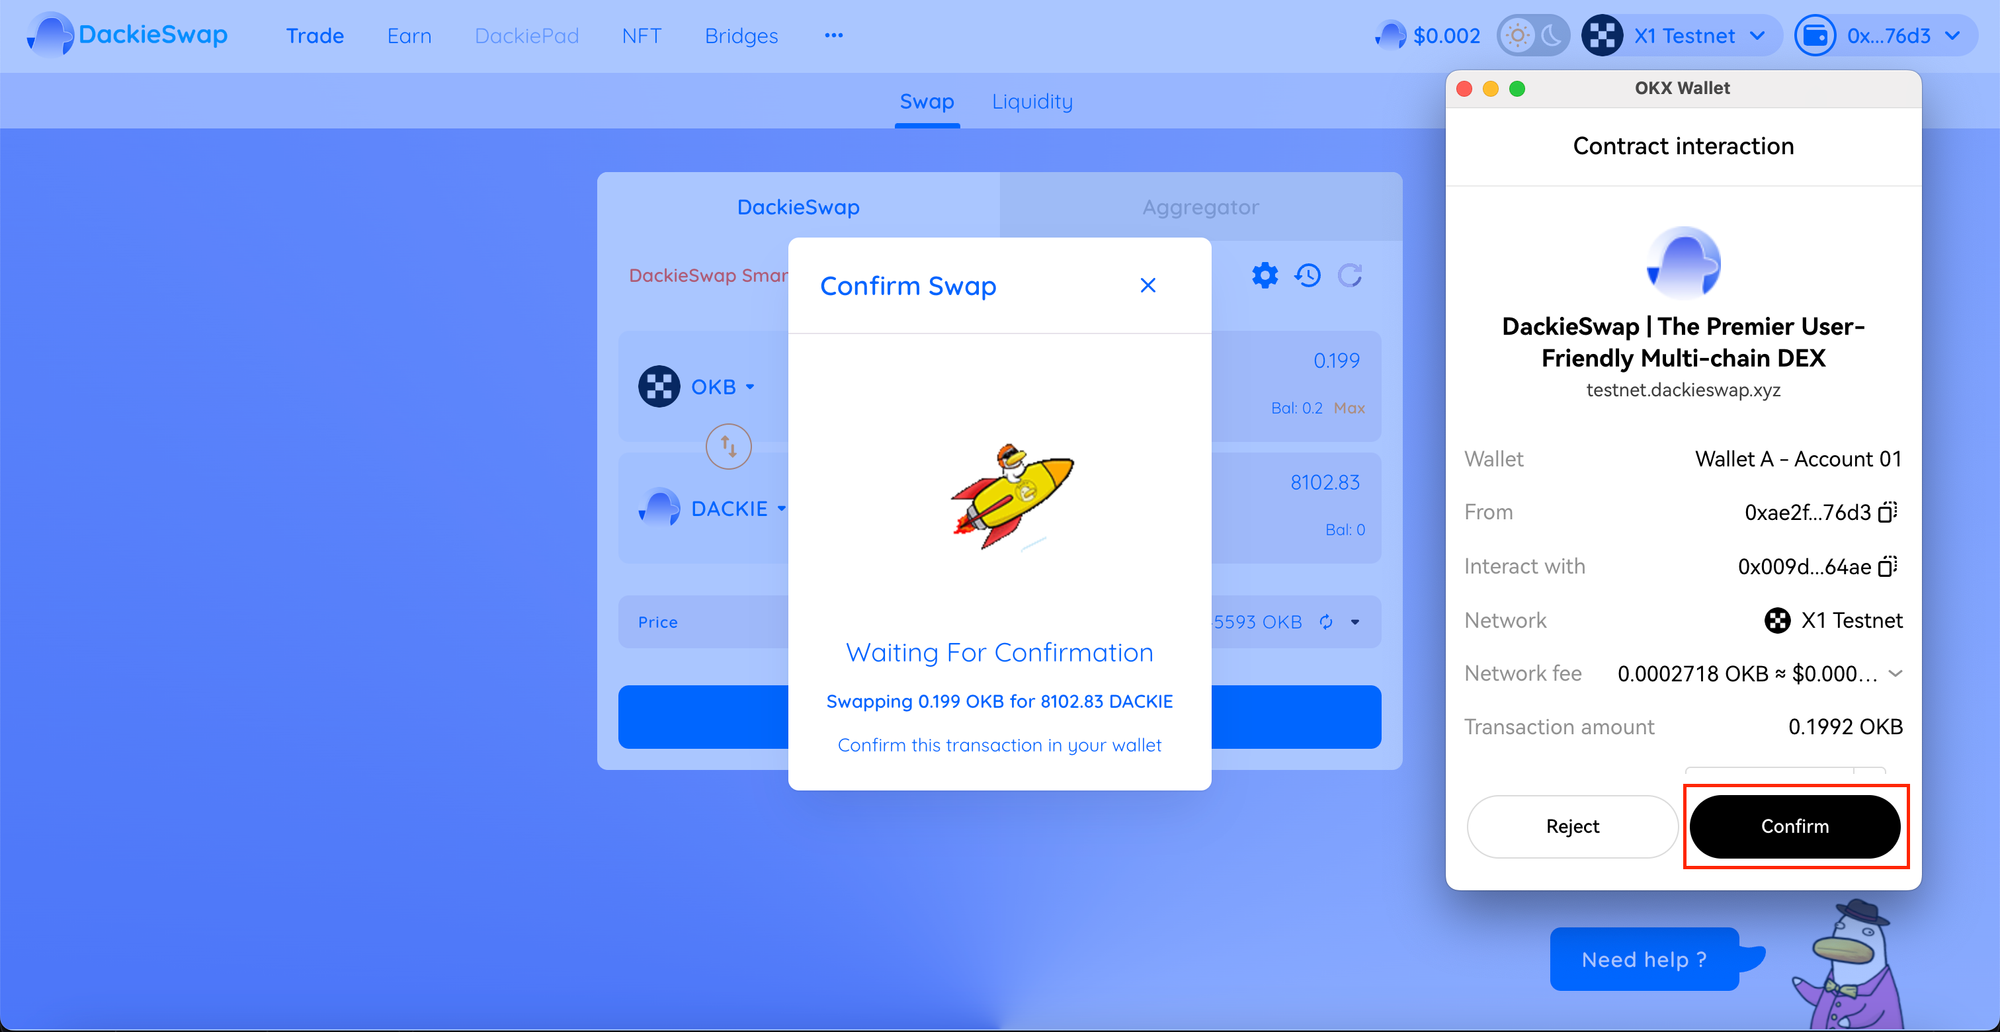
10/ A window with more details will appear. Check the details are correct. When you are ready, click the Confirm Swap button.

11/ A popup appears, and you need to click Confirm to complete.
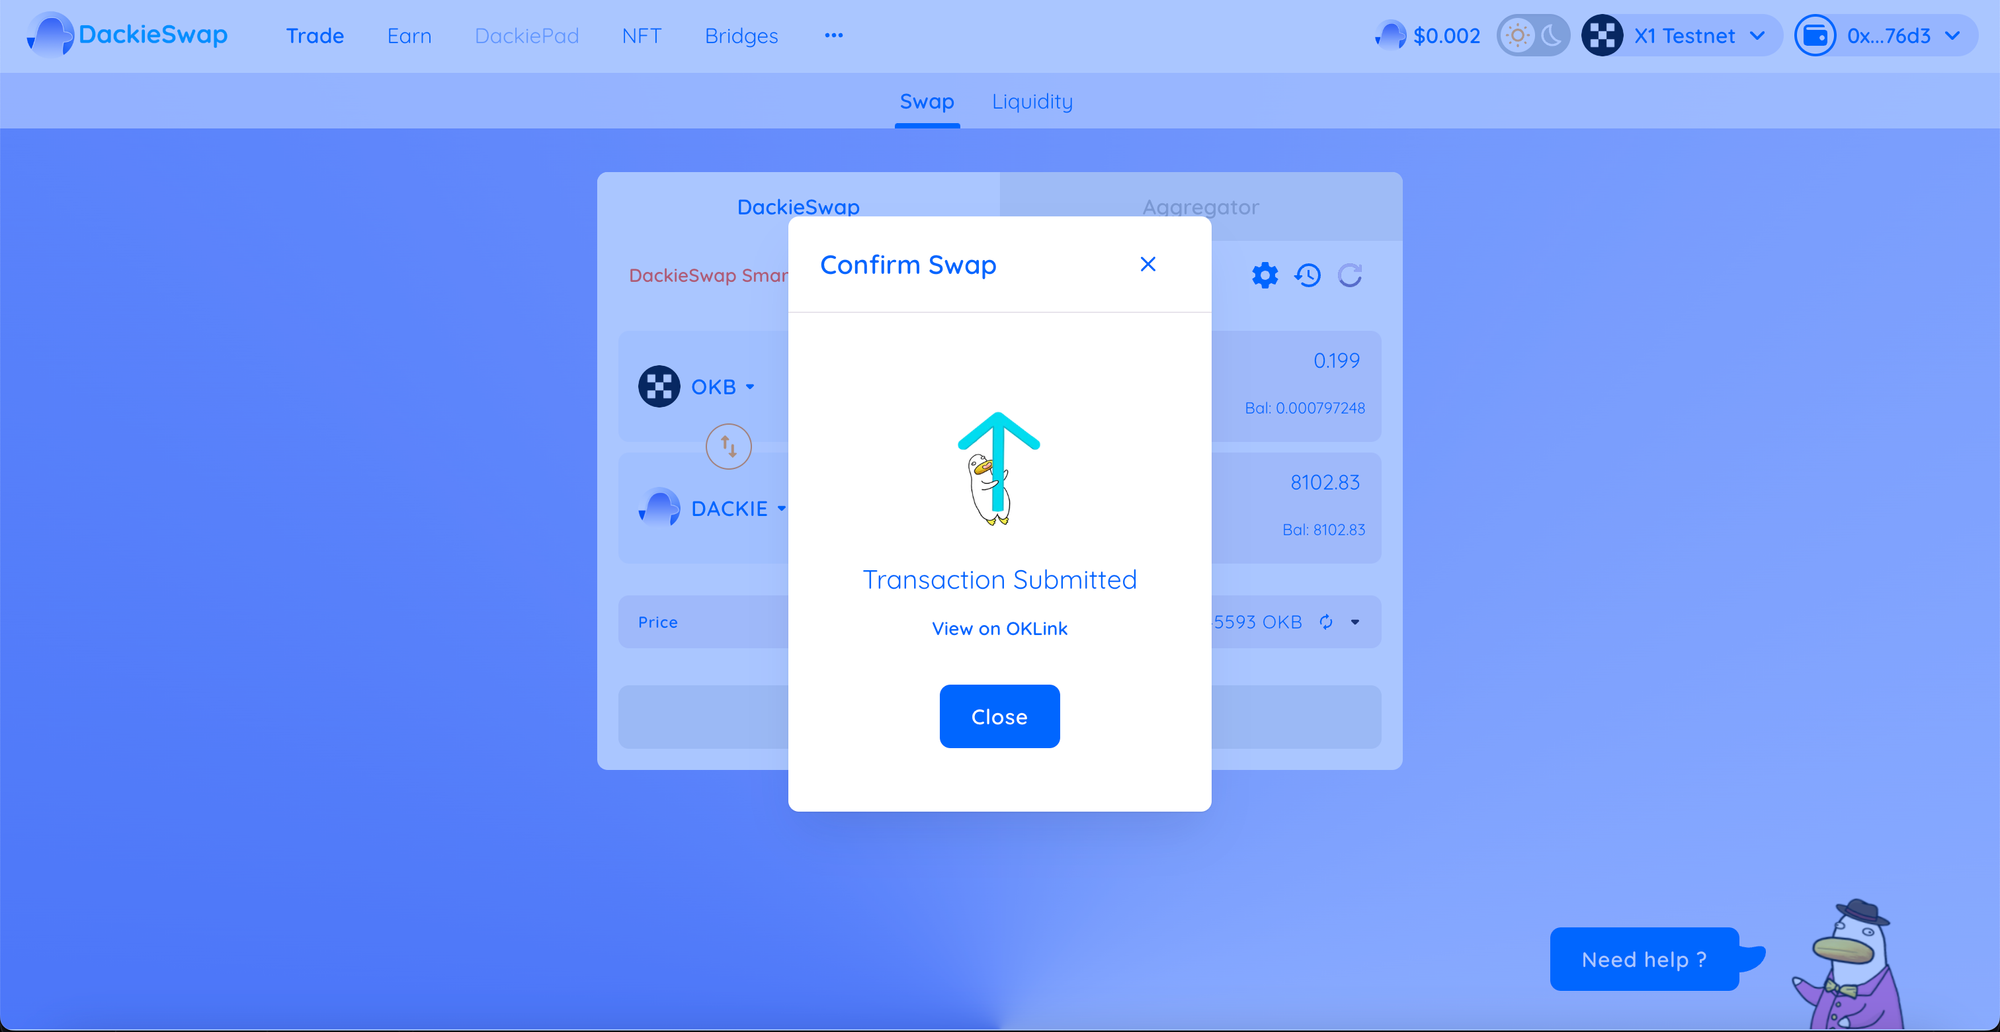
12/ Done! You can check your transaction by clicking the link shown above.
HOW TO ADD LIQUIDITY
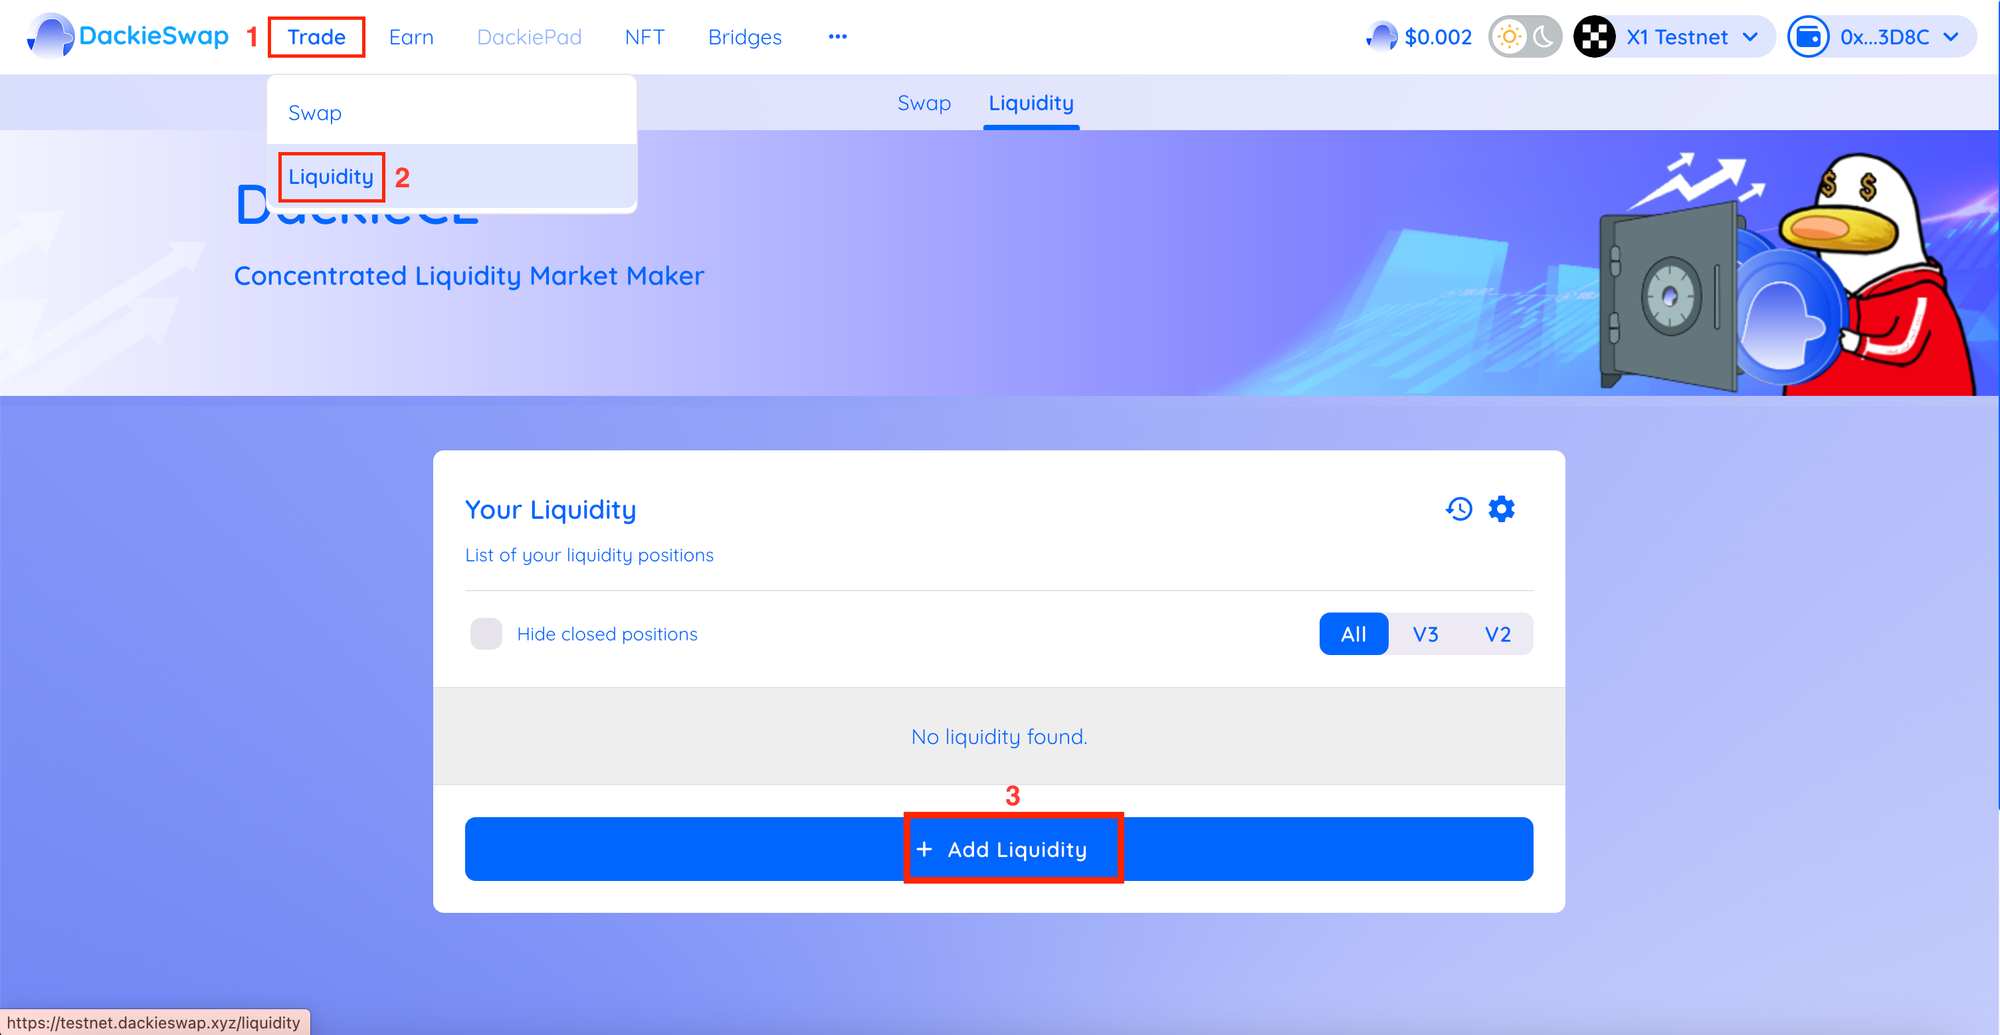
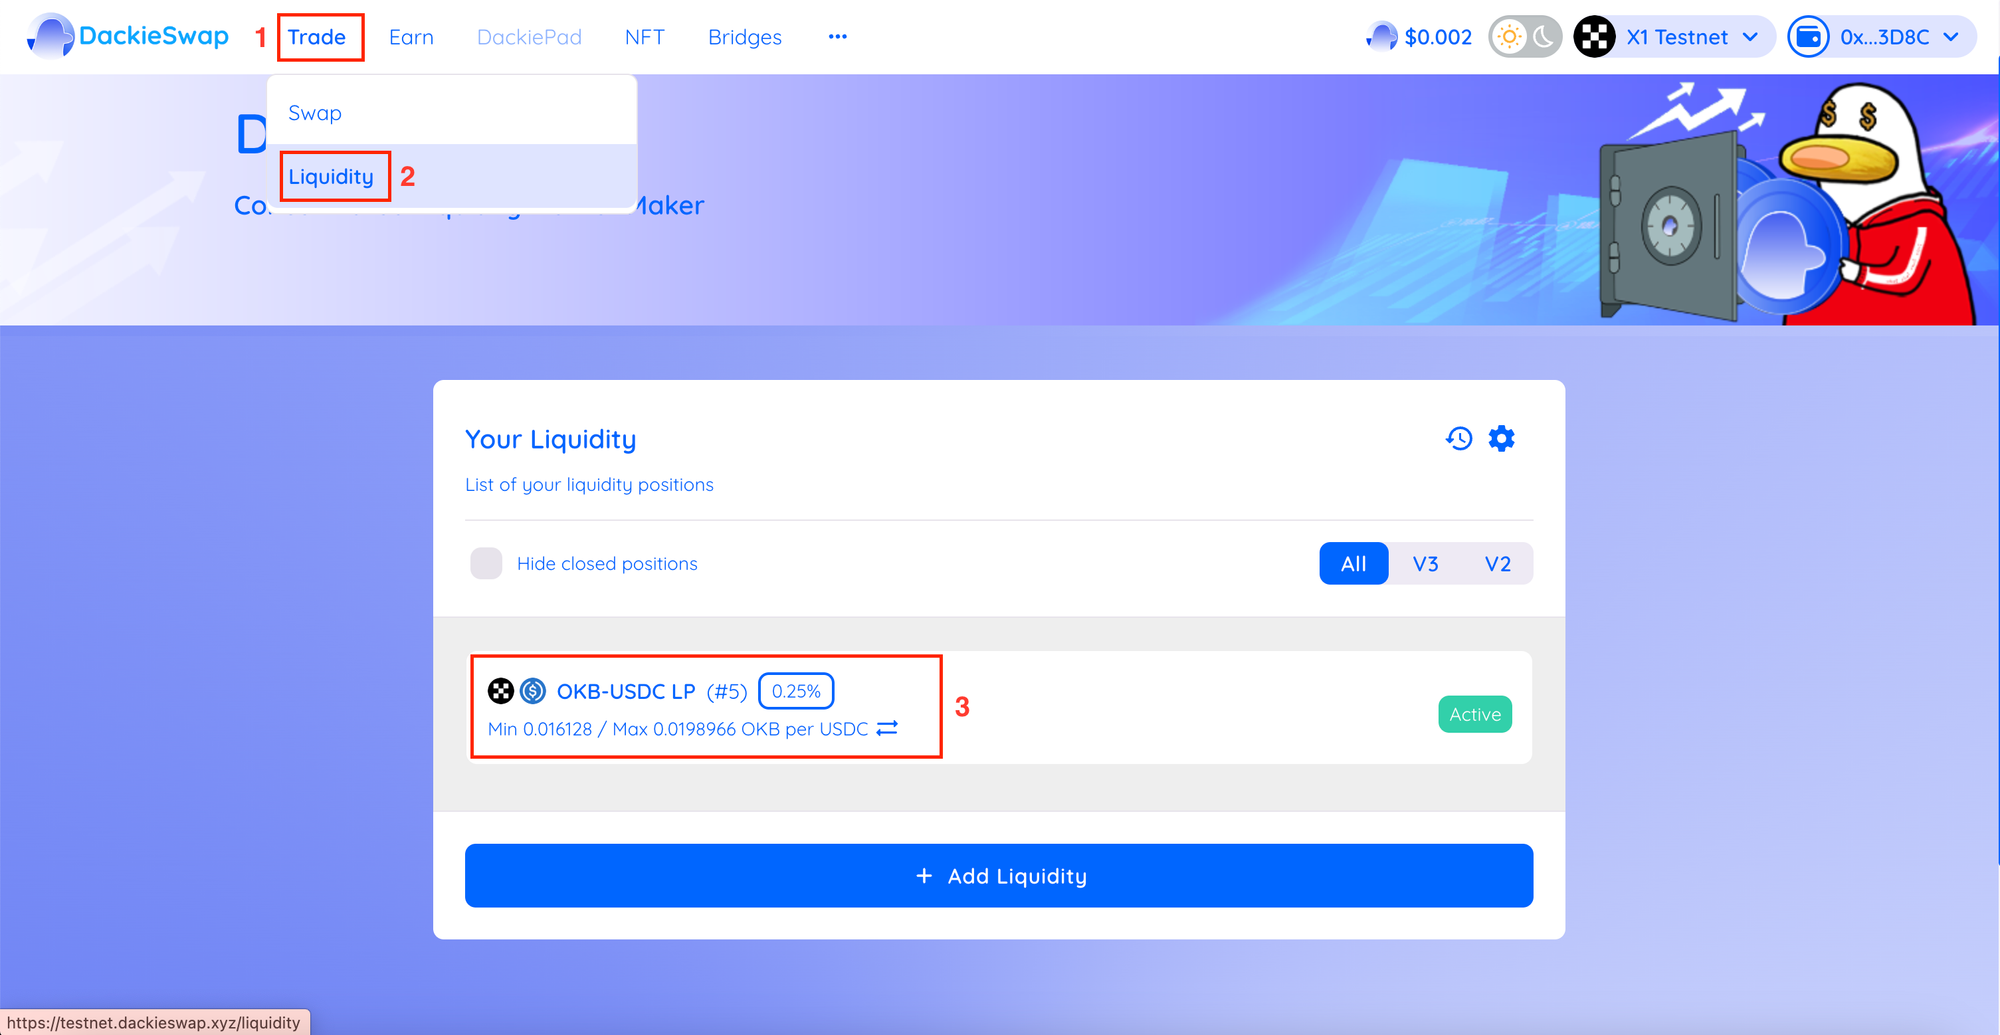
1/ Go to DackieSwap
2/ Choose Trade, click Liquidity
3/ Choose Add Liquidity
4/ Using the top left Input, choose the two tokens in the trading pair you want to add liquidity. Here, we are going to use OKB and USDC as an example.
5/ The interface will automatically choose the most popular trading fee tier and configure the price range for you.
6/ You can confirm the version as well as the fee tier of the liquidity pool you are providing by looking for the “V3 LP - x% fee tier” displays.
7/ Enter an amount on one of the tokens under “Deposit Amount”. The other should be calculated and filled automatically.

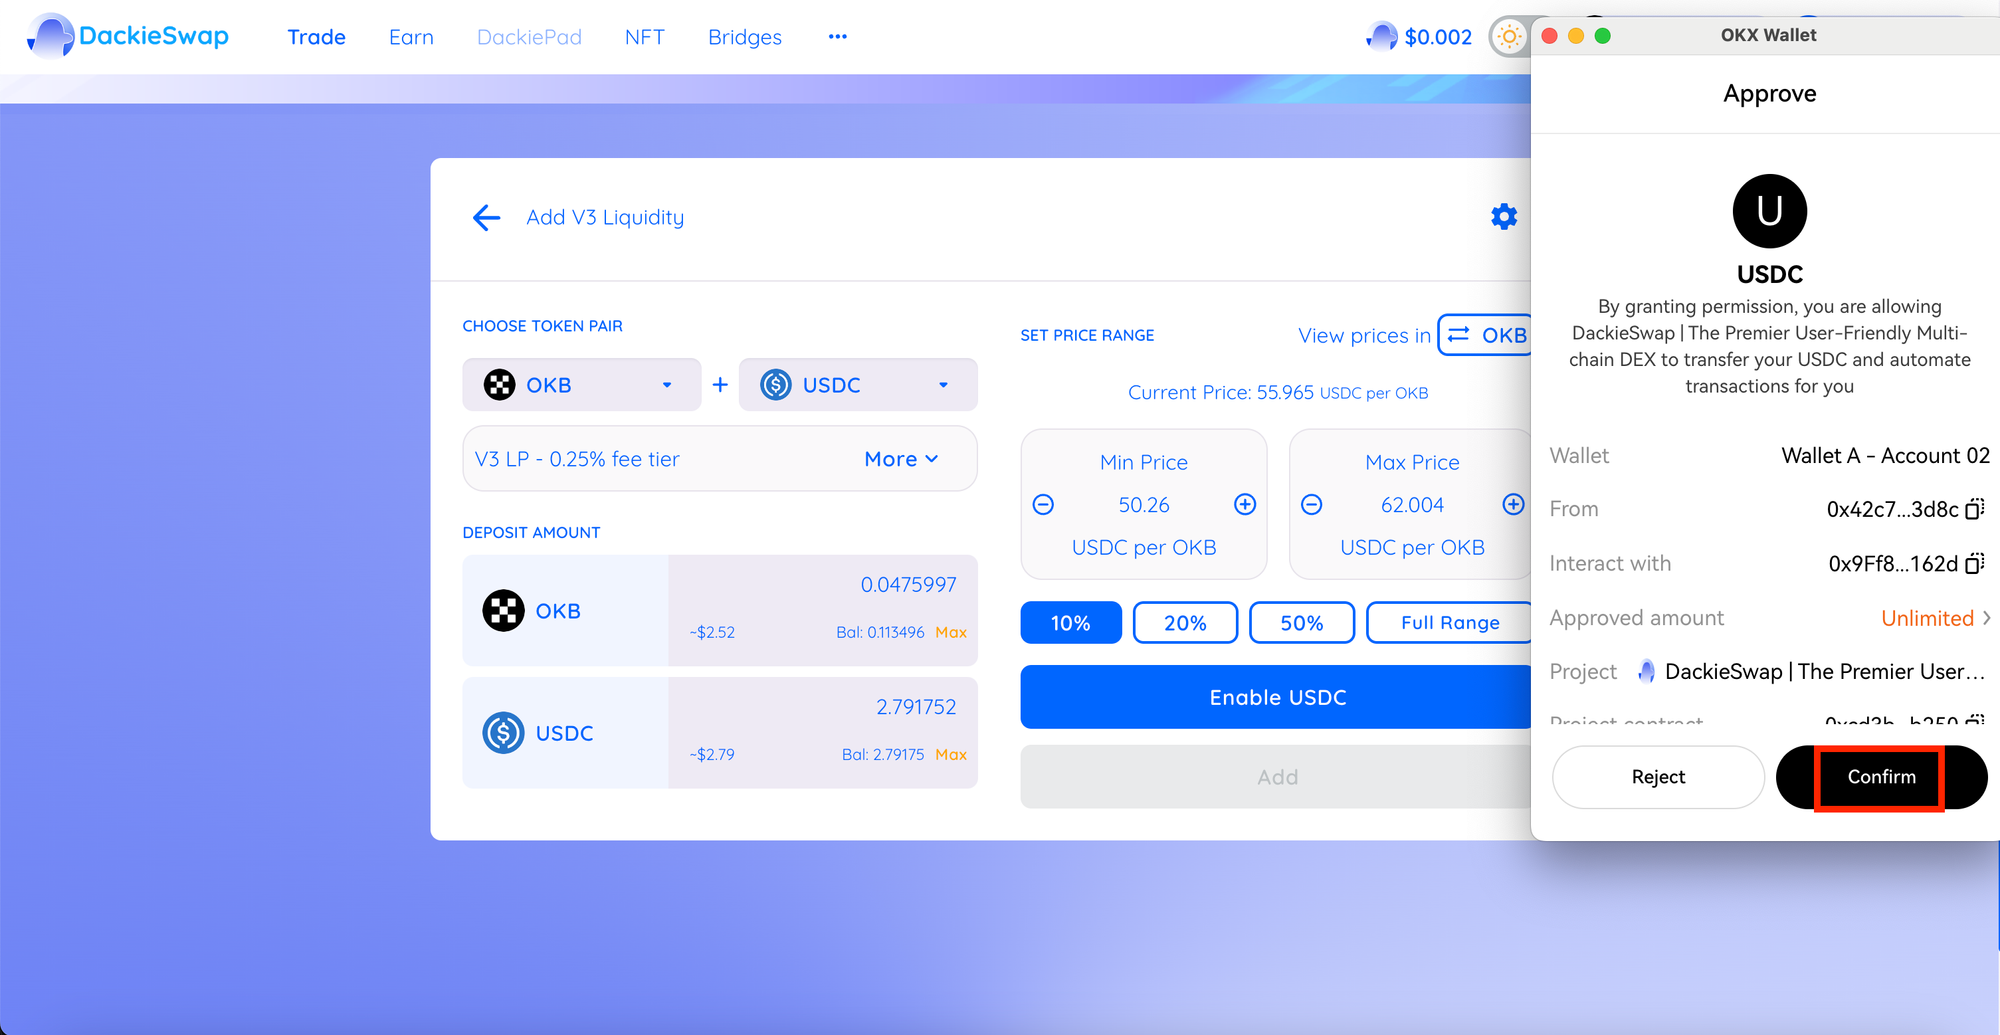
8/ Click the Enable USDC button, a new pop-up window will appear to confirm.
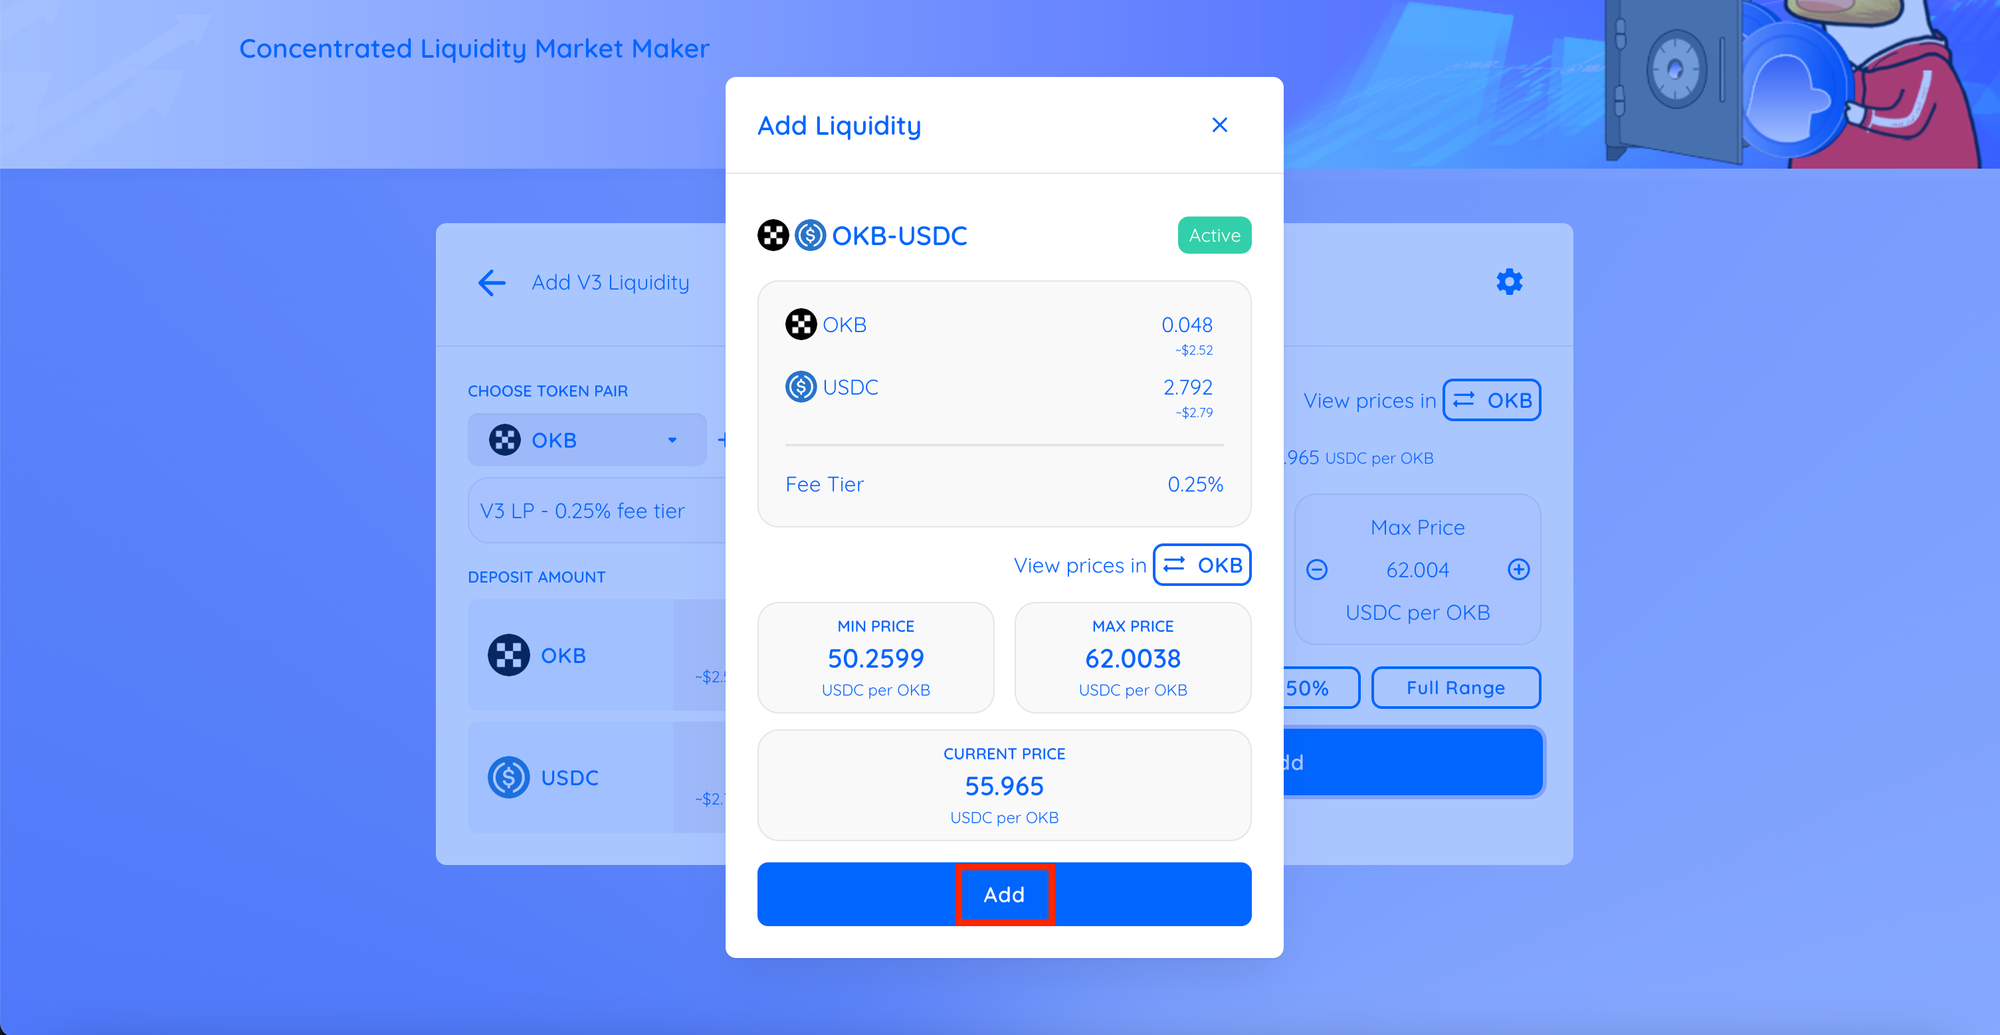
9 / After Confirm, The Add button will then light up. Click to proceed.
10/ A window with more details will appear. Check the details are correct. When you are ready, click the Add button.
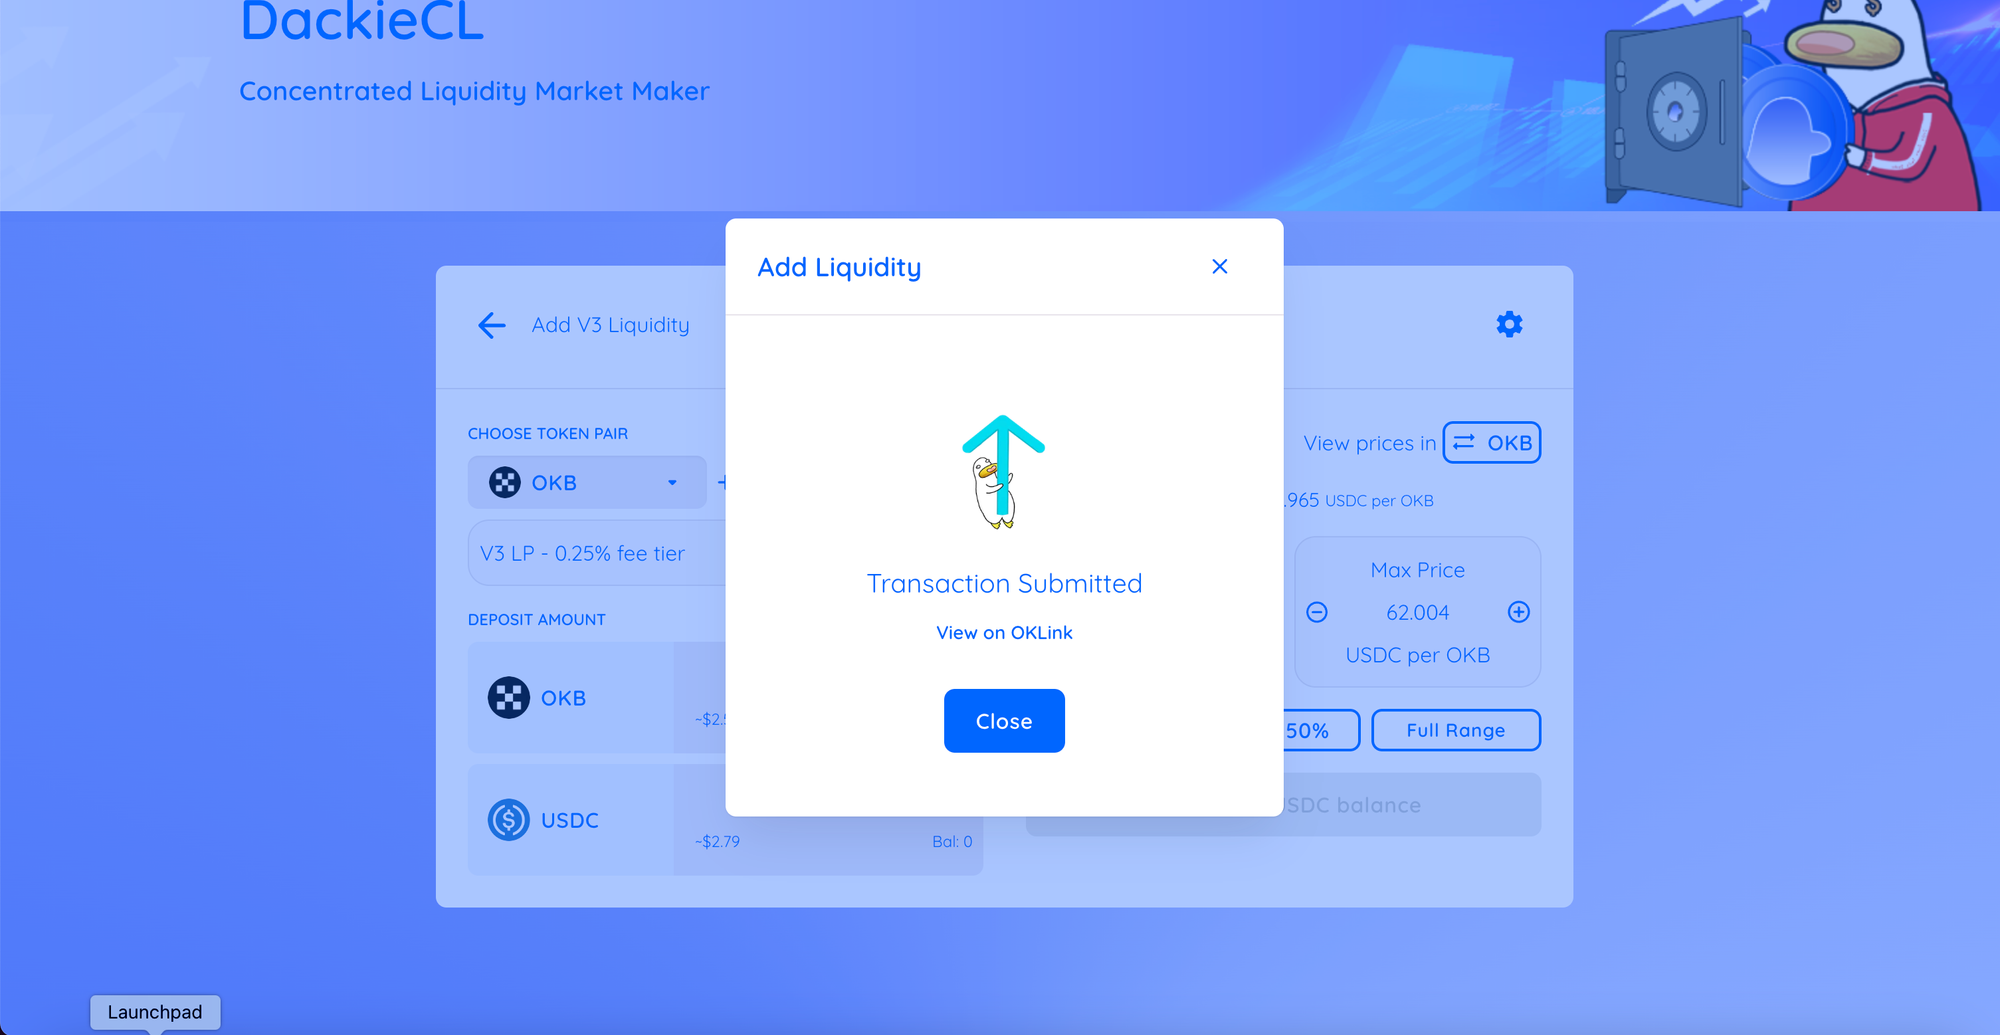
11/ A popup will appear, and you need to click Confirm to complete.
12/ Now you can check your transaction by clicking the link shown above.
HOW TO REMOVE LIQUIDITY
1/ Go to DackieSwap
2/ Choose Trade, click Liquidity.
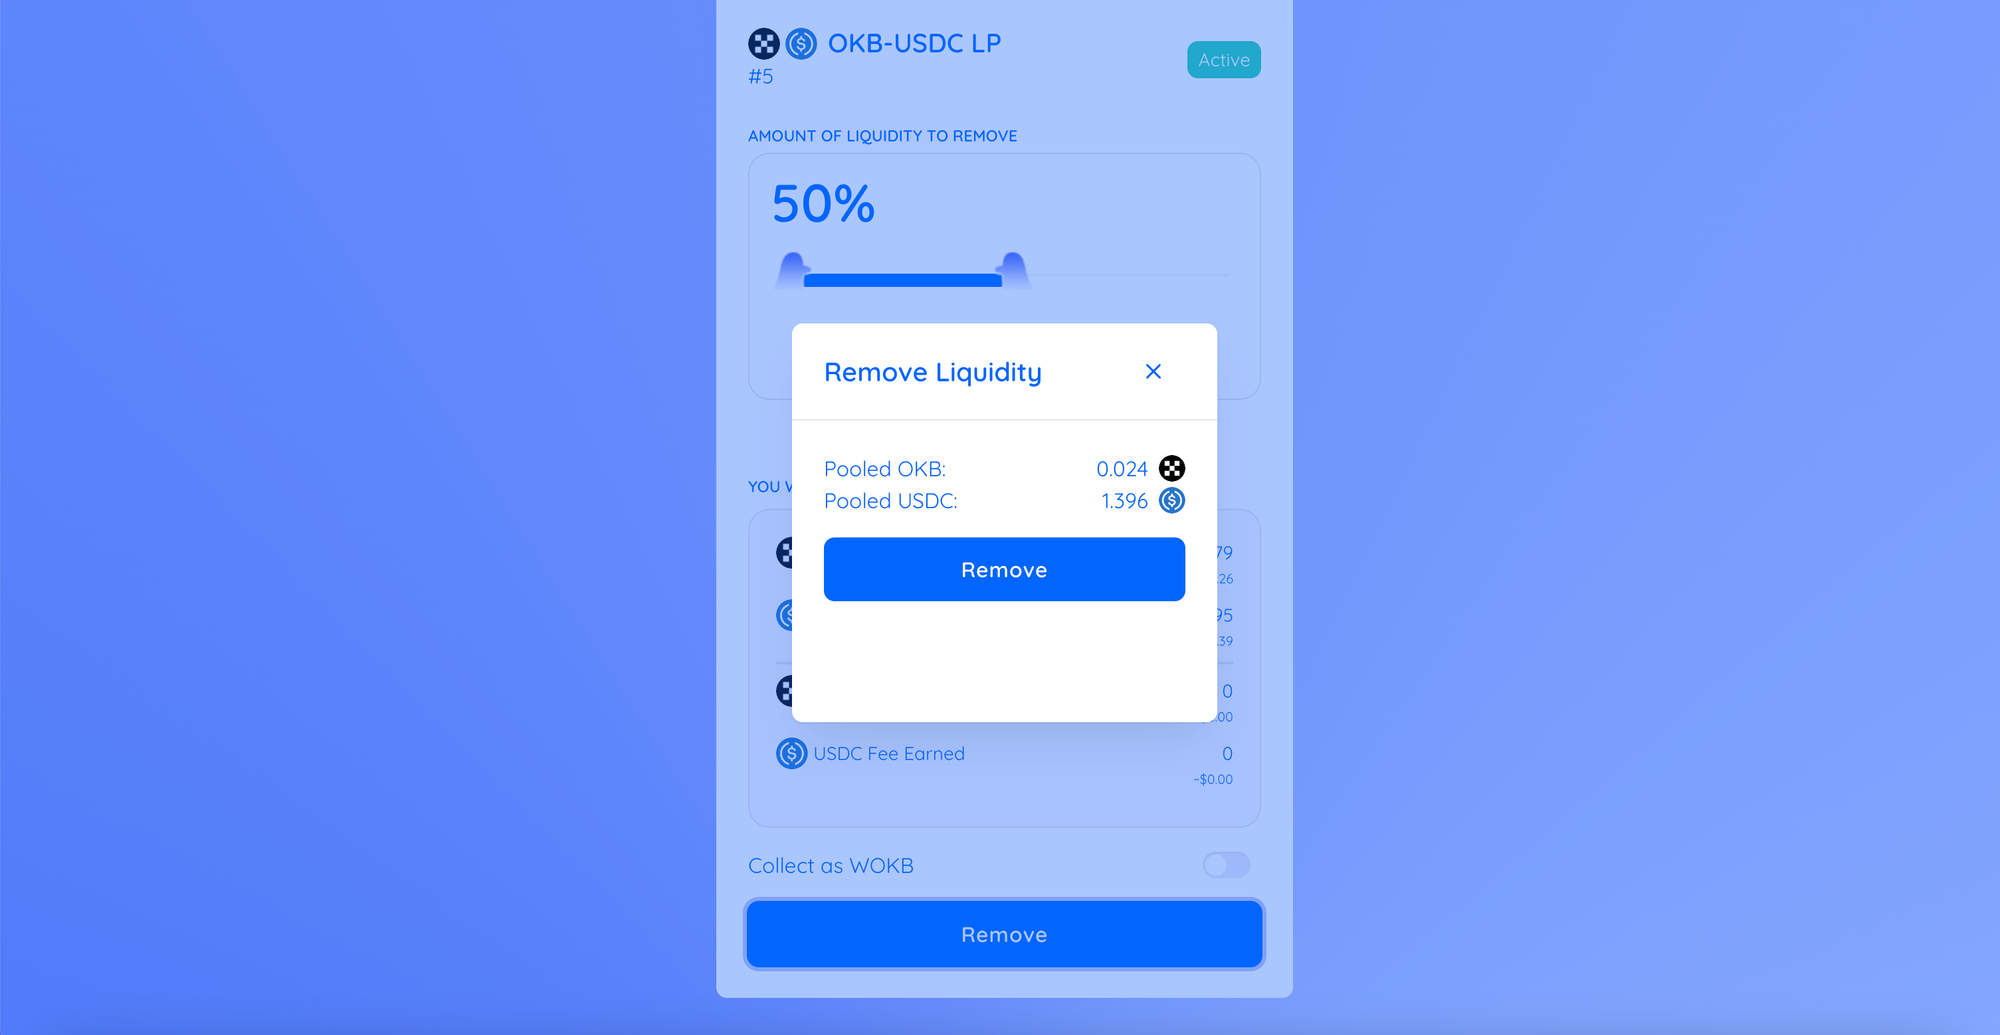
3/ Click on liquidity pool you want to remove.
4/ A window with more details will appear. Click Remove
5/ Use the buttons or slider to choose how much liquidity you want to remove.
6/ Click Remove to proceed.

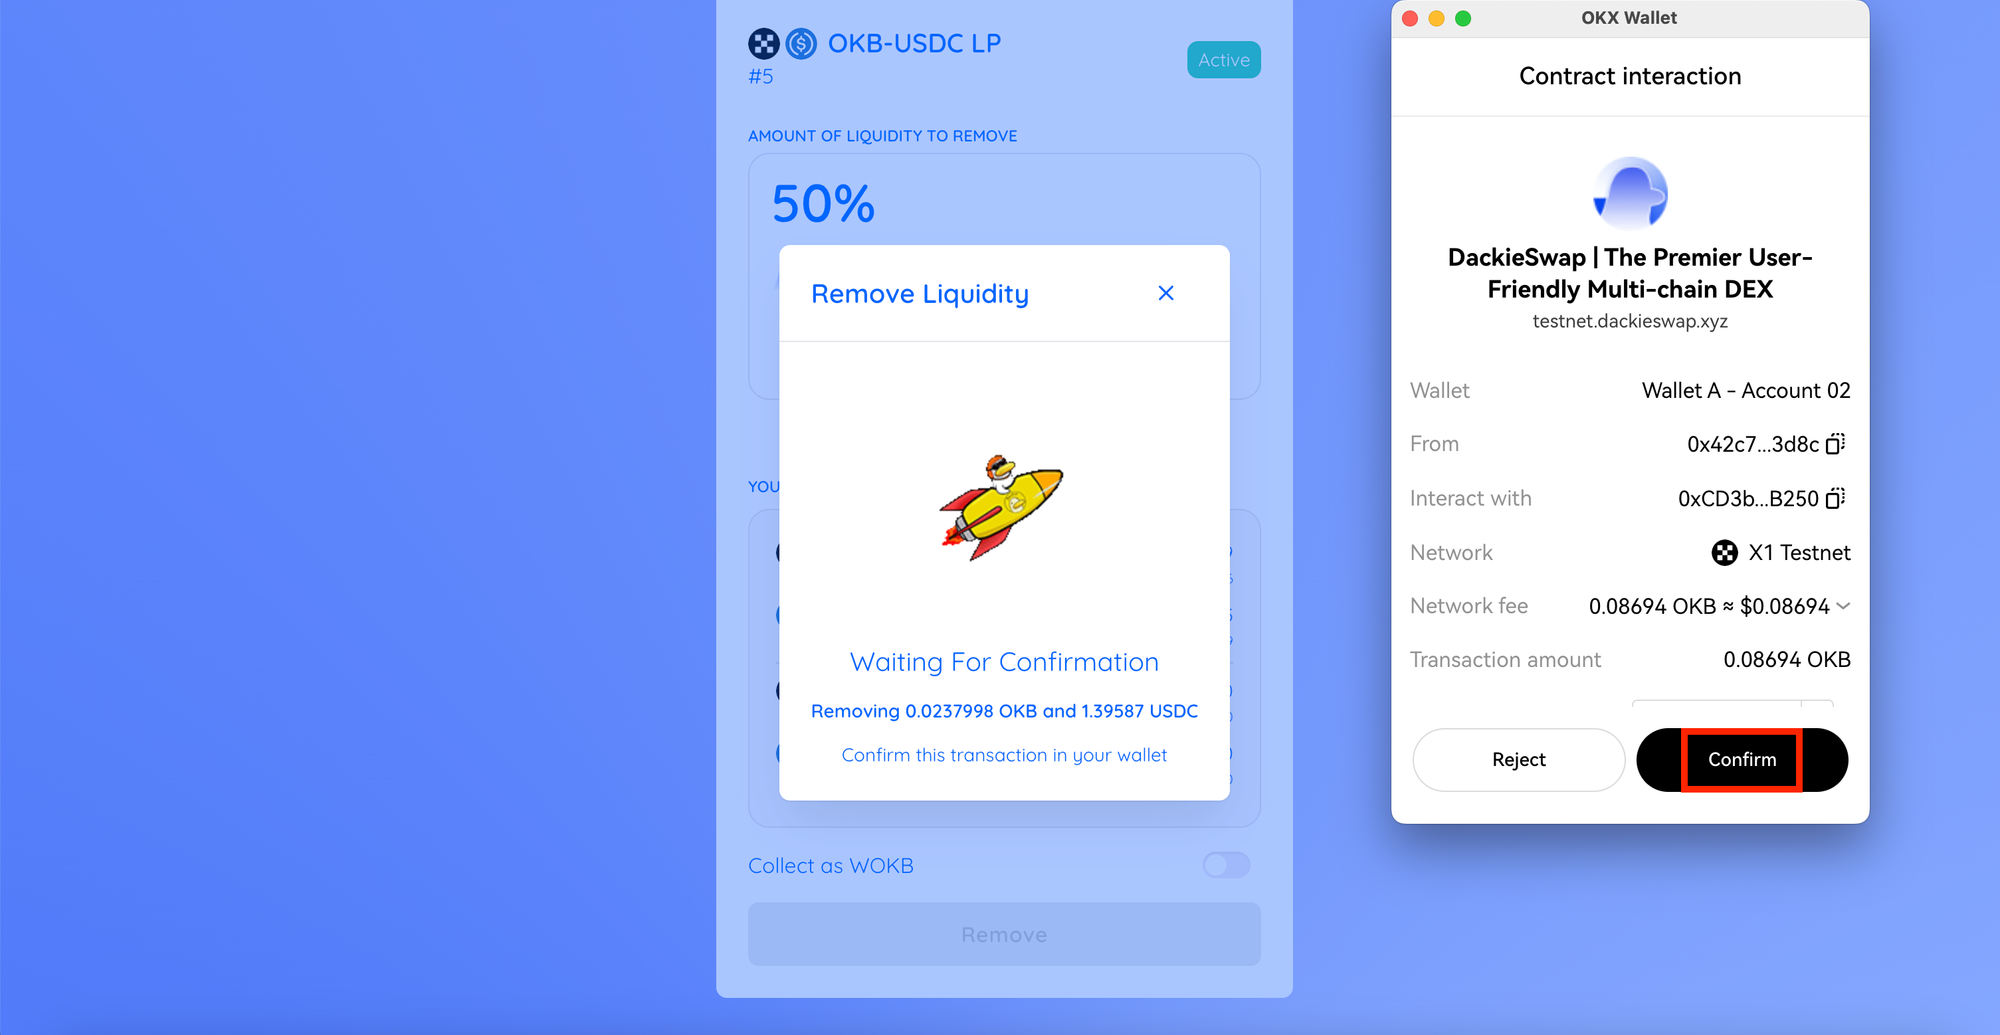
7/ A window will appear showing how many tokens you will receive. Click Remove again.
8/ Your wallet will ask you to confirm the action. Click Confirm
9/ After the transaction is confirmed. You will receive two of the tokens from your pair. And if you haven't removed all of your liquidity, your remaining liquidity value will be updated on the liquidity page.
THE END
-- DackieLabs --